Raspberry Pi AI Part V: Motion Detection, AI Computer Vision, and My Trials and Tribulations
Now that our dashboard is coming together nicely, quickly, and dirtily let’s incorporate motion detection. Motion detection tech is pretty cool. You are comparing frame data; if the data of from 1 is different than frame 2 then display “motion detected”. This is going to be our foundation for object detection with AI.
Editors Note:
I now find no value in uploading my code for this project to the blog. You can follow along with the project on GitHub and I’ll still document my process here. The reason for this is because I discovered GitHub Copilot in my Linux based VS Code. Its auto pumping (sometimes incorrect) code into my files. Its super useful though.
While I pride myself on not being a Vibe Coder I’m finding real value in leveraging AI to build AI. I’m not an aspiring developer, I’m just an IT engineer with dev hobbies. I’m learning a lot of troubleshooting techniques on topics out of my normal wheel-house, which is fantastic! But, I’m in no way cut out for dev work right now, and such, code will only be shared on GitHub going forward.
sudo touch motion.py
We’re going to create a new Python file named “motion.py”. This is going to be home to our motion detection code. A keypointer that I learned that if your picamera isn’t fixed to a sturdy object, you’re going to get shakes and that’s going to trigger our motion detection script. Play around the integer in this bit of code to reduce the sensitivity of your motion detection:
self.motion_detected = any(
     cv2.contourArea(c) > 1500
     for c in countours
)
Change that 1500 to a greater number to reduce the sensitivity.

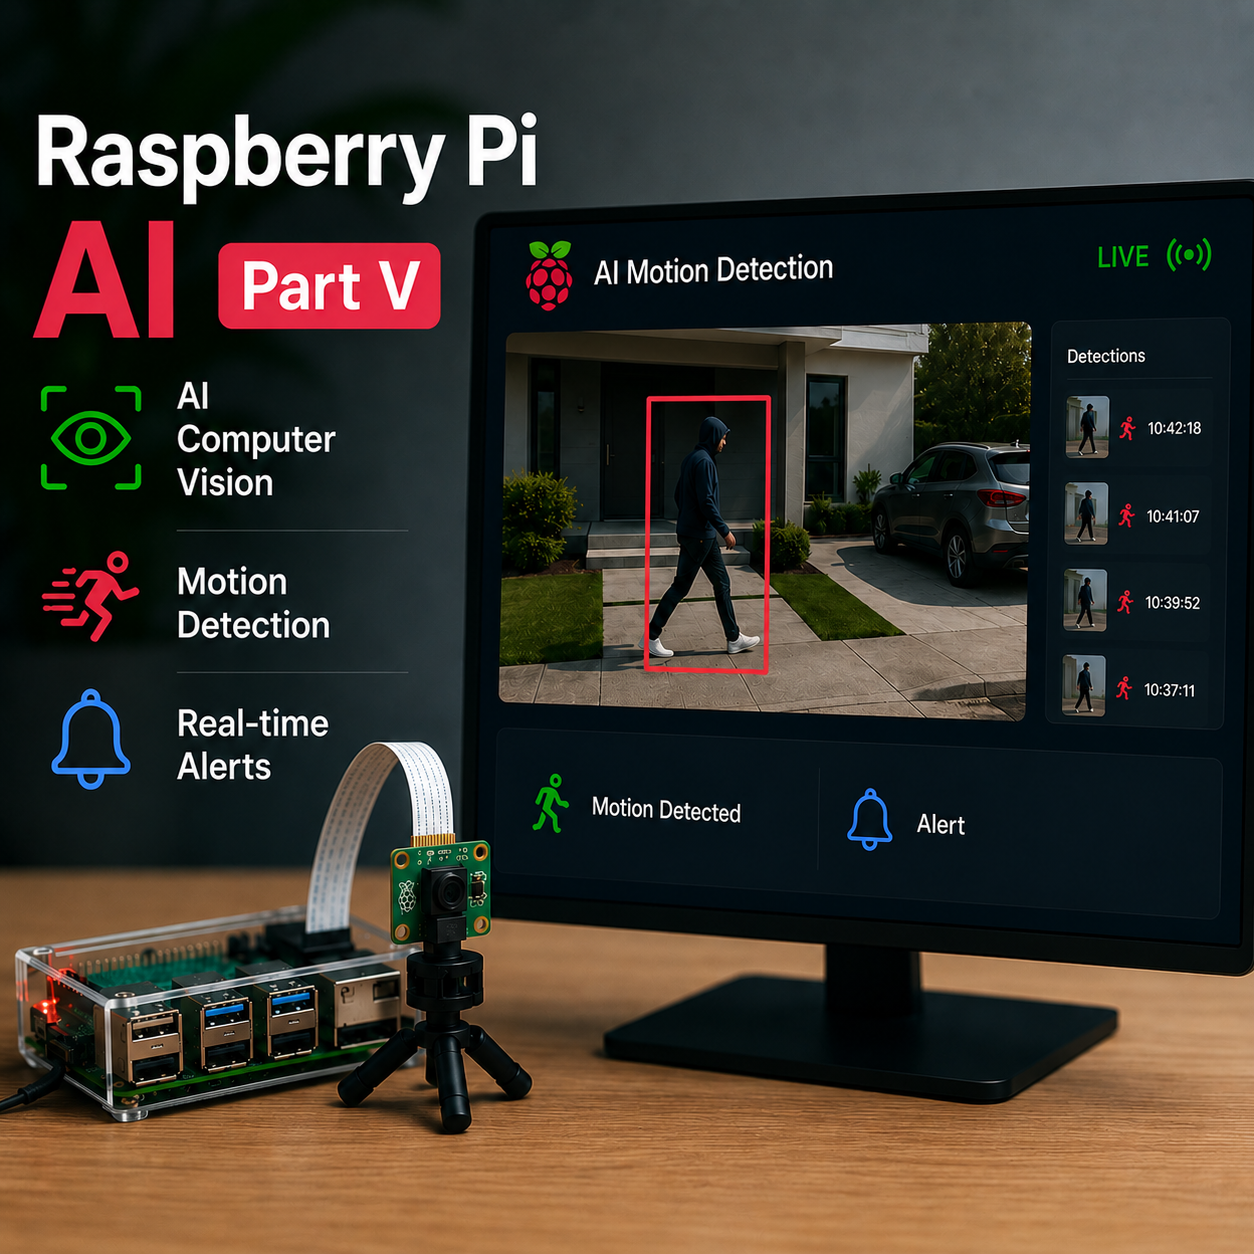
We have basic motion detection, but let’s ramp it up. Let’s incorporate object detection when motion is detected, that’s where Ultralytics YOLO comes in to play. Now we’re really going to start utilizing that $100+ AI hat, as YOLO is built on deep learning for computer vision and we could really use the extra juice!
First off, install YOLO onto your Pi with the following command:
sudo pip install ultralytics --break-system-packagesAgain, this isn’t a prod environment, so I’m ok with that closing flag. Don’t do this in production!
If you run this code, after installing YOLO, point the camera at yourself, and slap ENTER. It should return “Detected: person”
from ultralytics import YOLO
from picamera2 import Picamera2
import cv2
model = YOLO("yolov8n.pt")
camera = Picamera2()
config = camera.create_preview_configuration(
    main={"size": (640,480), "format": "RGB888"})
camera.configure(config)
camera.start()
frame = camera.capture_array()
results = model(frame)

for box in results[0].boxes:
    cls = int(box.cls[0])
    conf = box.conf[0]
    print(f"Detected: {model.names[cls]} ({conf:.2f})")
Success! You’ve officially used computer vision to detect yourself!
By the way: we’re using the lite model, yolov8n.pt” since we’re running this on a Pi
Now the Real Challenge Begins
Up until now, we’ve been running this without error on a Raspberry Pi. Now that we are implementing deep learning and computer vision, things become a bit mor resource intensive. I had to do a lot of playing around with values and code to try and optimize this for the Pi 5 the best I could. I tried running YOLO in a separate thread, but kept running into crashes. We’re really maxing out the capabilities of the Pi right now.
It took some finagling and stripping the Alpha channel out of the frames RGBA data, but I got person detection rolling in the live feed.

However, even my trusty coffee cup was detected as a person. That’s not what we want. This is because of our AI’s confidence scores. If you’re not familiar with how this works, when you get a reading, you’ll get a large output of what the model thinks the object is ranging from “toaster” to “mug” to “person”. So a low confidence score detecting a person, still counts as “person detected”. We need to fix that.
Confidence is Key
Let’s replace some existing code where we are just saying “If you even think this image MAY be a person, change label to “person detected”.”

We’re going to incorporate confidence scoring and set a threshold of .60 for the confidence score. Our logic changes to: “If you’re 60% sure that this is a person, change the label to “person detected”.”

Just Like in the Movies
Now we have person detection and confidence scoring, let’s spice this up with putting fancy boxes around the object that we detect. This is great for analysis and troubleshooting.

In order to accomplish this, we need to actually draw out the rectangle and map it’s borders to the object detected. Check out my function generate_frames() for how I did this.
What Can Go Wrong Will Go Wrong && Lessons Learned
Number one, stick to one source of code generation. Copilot really screwed me up with their code prediction. I spent hours trying to troubleshoot code across my JavaScript, Python, and HTML files because I blindly trusted Copilot. Not saying its a bad product. Just read and review code before dumping it in. That should be obvious.
Reflection
This has been the most difficult part of the project so far; spanning across two days and tall glasses of bourbon. I really had to leverage my AI agent for troubleshooting and coding. This whole project is unchartered territory for me, and my pride refuses to let me just pump and dump code. I strive to understand what my code is doing and how to troubleshoot it.
I kept breaking my generate_frames() function, and my order of events was just discombobulated. I persevered and ironed those pieces out. At times, I became frustrated by not understanding the errors output by YOLO/PyTorch, and it took a lot of doublechecking and prompts to get it working.
All in all, I’m frustratedly having a good time building this, and I can’t wait to incorporate the next steps whatever they may be.